
NGU IPSWICH CENTRAL / BRAYDAN FENDER
Old charm.
A fresh start.
29 Holt Street, Brassall
A practical renovation guide for bringing back the timber and refreshing the kitchen—one sensible project at a time.
Prepared 14 November 2026 · Indicative AUD budgets · DIY + selected trade work
BRAYDAN’S STARTING POINT
Keep what works.
Let the timber shine.
The white cabinets are already fairly neutral. My first focus would be the patterned floor, splashback and timber handles. There is polished timber underneath the kitchen covering, according to Braydan; a floor specialist should confirm its condition before removal and refinishing. Keep the layout, teal benchtops, timber edges and appliances for this modest refresh.
BEFORE / WHAT COULD BE
The kitchen, warmed up.
Option B · $2,450–$4,850
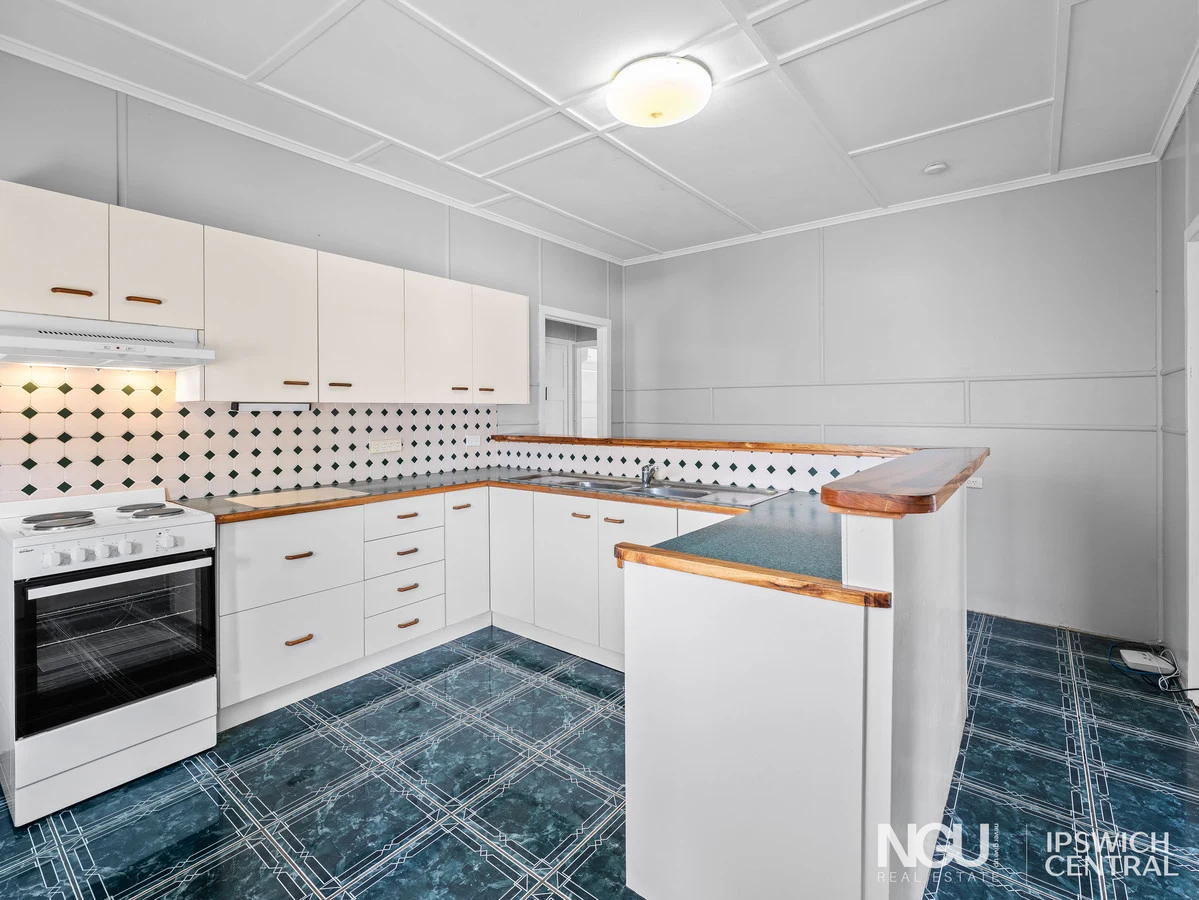 Before · listing photograph
The concept shows restored warm timber floorboards, a warm-white painted splashback and slim black handles. Existing white cabinets, teal benchtops and appliances stay. Tile outlines remain visible after painting.
After images are AI-generated design concepts, not completed works. Colours, timber grain and small details may differ. Original photography: NGU Real Estate.
START SMALL / BUILD FROM THERE
Choose your starting point.
Each package includes a 15% contingency. These are alternative scopes, not amounts to add together.
YOUR PLANNING ALLOWANCE
Kitchen refresh + timber restoration, including 15% contingency.
Optional extras
Only repaint cabinets if cleaning is not enough. Bathroom extra covers cleaning supplies and accessories, not repair or waterproofing.
What is inside the recommended kitchen budget?
| Item | Allowance before contingency |
|---|---|
| Cleaning, handles and small supplies | $200–$400 |
| DIY splashback coating system + tools | $250–$450 |
| Material assessment / testing | $200–$500 |
| Non-hazardous floor removal + disposal | $400–$900 |
| Professional timber sanding + coating | $900–$1,600 |
| Minor board / threshold repairs | $150–$350 |
| Subtotal | $2,100–$4,200 |
Option B adds 15% contingency and rounds the total to $2,450–$4,850. Option C adds $1,800–$3,500 for exterior accent work and $150–$400 for gardening before contingency, then rounds its total.
Planning estimates including GST where applicable, not quotes or a measured basket. Assumes roughly 12–18 m² of kitchen floor, sound cabinets/tiles and unpaid DIY labour. Excludes hazardous-material remediation, major repairs, new appliances, plumbing/electrical work and a full exterior repaint. Small floor jobs may attract minimum charges. Obtain written quotes and confirm the actual floor area.
THE PRACTICAL PART
A sensible order of work.
Check before lifting
Have a flooring specialist identify the covering, backing and adhesive and inspect the boards underneath. Test suspect materials before any lifting, scraping or sanding. An older home needs assessment before exploratory demolition. Confirm whether the timber needs cleaning/recoating or full sanding.
Measure, label, clean
Count handles and measure the screw centres, not the overall handle length. Remove one as a sample. Clean doors and splashback with diluted sugar soap as directed, rinse and dry. Check for loose tiles, leaks and swollen cabinet edges.
Refresh the splashback
Keep sound tiles and coat them warm white using a compatible preparation, primer and tile paint system. Test adhesion first. Follow the current label for coating, recoat and cure times and any required clear coat. Keep cooker clearances and electrical fittings untouched.
Bring back the timber
Ask the floor specialist to remove the cleared non-hazardous covering carefully, repair minor defects and match the adjacent floor finish with a sample. Agree on the sequence: dusty work before final finishing coats, and protection for new paint and floors. Follow the contractor’s access and cure schedule.
Finish with the details
Fit handles that match the existing holes and check clearances. Let coatings fully cure before normal use. Keep the existing white cabinets unless they need repainting. Allow several working days and roughly 1–3 weeks elapsed for Option B, subject to testing, trades and drying.
MEASURE FIRST / SHOP SECOND
Your Bunnings shortlist.
Open the product, check your local store and confirm compatibility. Links checked 14 November 2026; prices and stock can change.
Selleys concentrated sugar soap, 1L ↗︎
Start with one bottle; allow $10–$20 plus cloths and gloves. Dilute and rinse as directed.
Kaboodle 128 mm matte black Turbo handle ↗︎
A style example only. Count handles and match hole centres. Allow 12–20 handles at $6–$12 each; actual basket may differ.
Dulux Renovation Range Primer, 1L ↗︎
$82.50 displayed online. Confirm coverage and required primer for your substrate; this is not the complete paint system.
Dulux satin Tiles and Benchtops, white 1L ↗︎
For the splashback in this guide. Allow $250–$450 for preparation, primer, coating, required clear coat and tools.
Dulux satin Cabinet Doors, white 1L ↗︎
Optional only if existing doors need painting. Full DIY coating system allowance: $350–$650 before contingency.
Dulux Weathershield, 4L ultra deep base ↗︎
$131 displayed online. Example topcoat/base only: painter to specify compatible metal/timber primer, tint and finish.
Tools and paint quantities
Allow for a screwdriver, tape measure, labelled bags, drop sheets, masking tape, suitable mini rollers/brushes and trays, gloves and eye protection. These basic consumables are included in the allowances. Use abrasives only after materials/coatings are confirmed safe.
Measure every surface to be coated and use the chosen product’s labelled coverage and coat count. Round up to whole packs, allowing for edges and waste. One linked 1L tin is not a promise that one tin will cover the whole kitchen.
Current Dulux system guidance ↗︎ · Bunnings cabinet painting instructions ↗︎BEFORE / WHAT COULD BE
A quieter exterior palette.
Accent repaint · $1,800–$3,500 before contingency
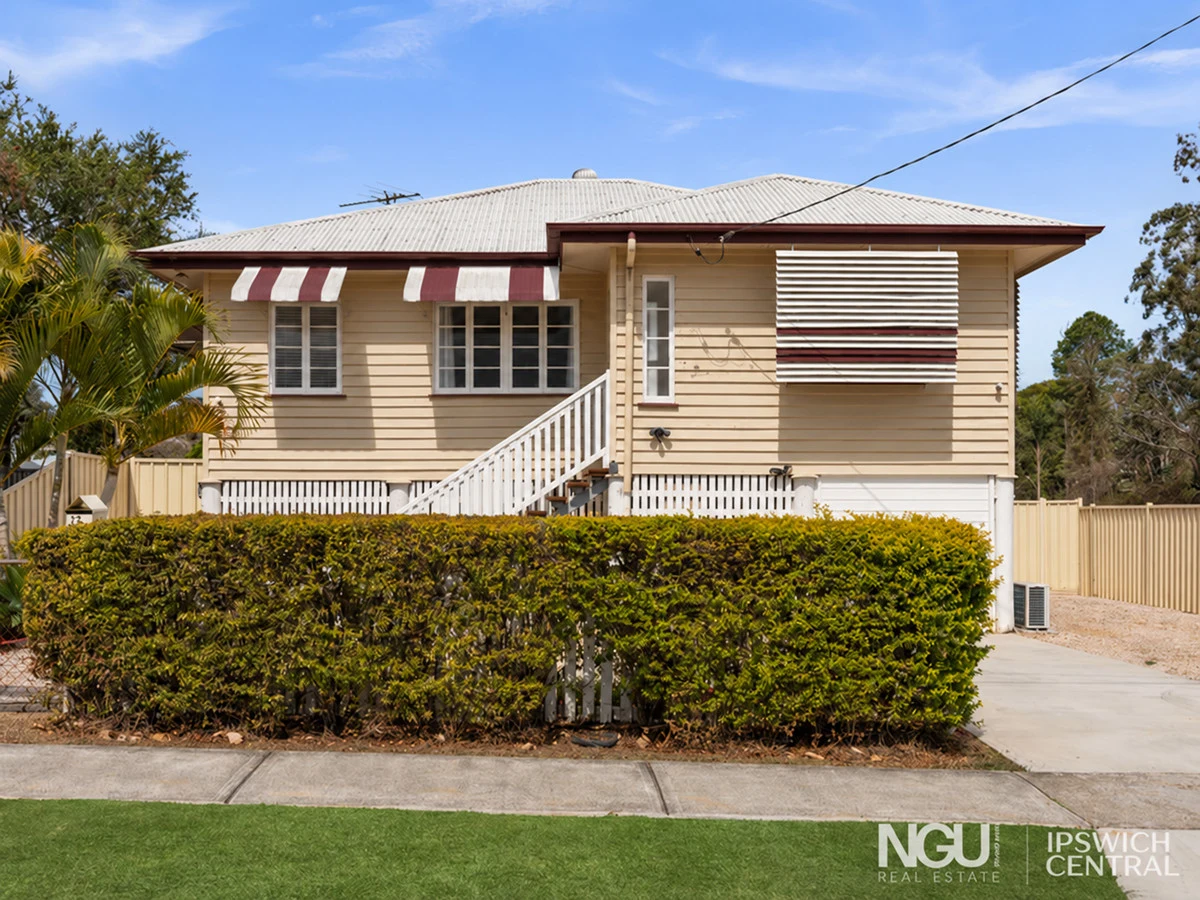
Before · listing photographKeep the cream walls, white windows, roof, stairs, awnings and garden. The concept changes burgundy fascia/gutter and awning accents to warm charcoal. This is an optional professional repaint, included in package C; it is not a whole-house repaint.
After images are AI-generated design concepts, not completed works. Colours, timber grain and small details may differ. Original photography: NGU Real Estate.
KNOW WHERE TO STOP
No need to do everything.
The listing says the home has already been freshly painted. Confirm which surfaces were done before repainting. Keep the bathrooms and existing timber floors elsewhere initially. For the garden, trim the hedge, edge the lawn and refresh existing beds, keeping mulch away from the house and termite inspection lines visible.
High fascia and awning work needs suitable access and a painter’s preparation plan. Have older coatings assessed before sanding. Do not pressure-wash suspect asbestos materials.
YOUR NEXT STEPS
A short checklist.
This on-page checklist is temporary. Download the fillable booklet to save your budget, measurements and quotes.
Sources, examples and scope
NGU property listing and original photographs ↗︎ · Published floor-restoration rate reference ↗︎ · Real Bunnings community before-and-after example ↗︎
The presence of polished timber beneath the covering was advised by Braydan; its condition is not established by these photos. Estimates are editorial planning allowances, not trade quotes. AI concepts illustrate proposed changes and are not evidence of completed work or a guaranteed finish. This NGU property guide is not affiliated with or endorsed by Bunnings or Dulux.